Installing NixOS with root on tmpfs and encrypted ZFS on a netcup VPS
I’ve recently ordered a netcup VPS. Before, I had a Kimsufi server and although it had 2TB of storage for roughly 7€ per month, I found it too expensive and too slow for my needs.
As I’ve now started hosting services at home, my VPS needs are only hosting a personal mailserver, my personal websites, a headscale server and to serve as a bastion server for some services I host at home that I want to be accessible from the outside world.
This means that I don’t need anything too powerful and can go with something cheaper. My final options were Hetzner Cloud CPX11, Scaleway Stardust, BuyVM Slice 1024 and the netcup VPS 200 G10s.
I ended up choosing the netcup VPS as it seemed to be the best value for the money.
If I weren’t hosting email, I’d strongly consider simply using Cloudflare Tunnel ou Tailscale Funnel for exposing some services to the public Internet and skip the VPS altogether.
The following post describes how I set up NixOS on this VPS.
Enabling UEFI boot #
The first step was to enable UEFI booting on the server. Quite simple, just go to the VPS dashboard website > Settings > UEFI Settings > Activate UEFI Boot.
Booting the NixOS ISO #
Thankfully, netcup allows its users to boot their servers with their ISOs of choice. If all you want is a standard NixOS setup, nixos-infect may be enough for your needs. However, I want to install ZFS with encryption which requires formatting the existing partitions. By being able to boot from the NixOS ISO, we skip the headache of installing NixOS through other exotic methods, such as installing from a rescue image or from running a kexec on the original deployed Linux distro (and that is a matter for another post).
This meant I had to download the NixOS ISO and upload it to their FTP server. The credentials for uploading custom images can be found in Media > DVD Drive > Login data to FTP.
However, after running the usual SFTP command, I got the following error:
❯ sftp -P <sftp-port> <username>@<sftp-hostname>
Unable to negotiate with <sftp-hostname> port <sftp-port>: no matching host key type found. Their offer: ssh-rsa,ssh-dss
So I explicitly allowed ssh-rsa and it worked as expected:
sftp -oHostKeyAlgorithms=+ssh-rsa -P <sftp-port> <username>@<sftp-hostname>
sftp> put Downloads/nixos-minimal-22.11.1347.0bf3109eeb6-x86_64-linux.iso cdrom/
Now, to boot from the uploaded ISO, we’ll go to Own DVDs and click on attach DVD:
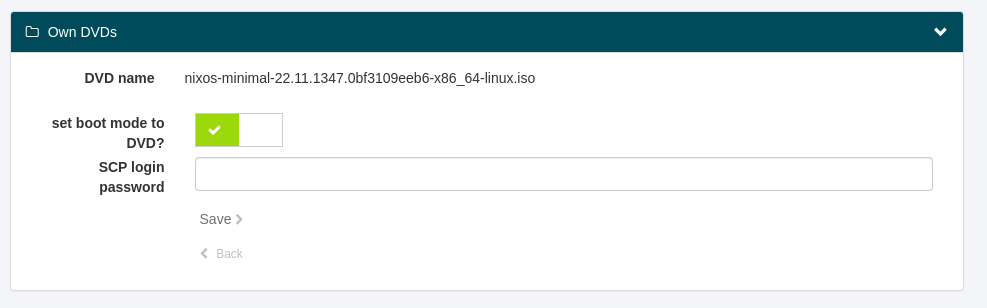
And reboot the server.
Installing NixOS #
Networking the live ISO #
After booting to NixOS on the server, I found it had no network connectivity. So I connected through VNC through the control panel and am now in the NixOS live ISO.
We’ll start by manually setting up the network, according to the Network section of the control panel:
ip addr add <server-ip>/<prefix-length> dev <ethernet-network-interface>
ip route add default via <gateway-ip> dev <ethernet-network-interface>
echo "nameserver 1.1.1.1" > /etc/resolv.conf
We can now change the password for the root and finish the installation through SSH or just continue using the VNC window.
Partitioning #
Now, we’ll wipe the drive and create its partitions:
wipefs -a /dev/sda

parted -a optimal /dev/sda
(parted) unit mib
(parted) mklabel gpt
(parted) mkpart ESP fat32 1 513
(parted) set 1 boot on
(parted) mkpart primary 513 100%
(parted) quit
We’ll now format the /boot partition:
mkfs.fat -F 32 -n boot /dev/sda1
Finally, we’ll create the ZFS pool for the persistent datasets:
ls /dev/disk/by-id/* # Find the correct disk.
ls /dev/disk/by-path/* # ... or if the VM is using virtio

zpool create \
    -o ashift=12 \
    -o autotrim=on \
    -O acltype=posixacl \
    -O atime=off \
    -O canmount=off \
    -O compression=zstd \
    -O dnodesize=auto \
    -O normalization=formD \
    -O xattr=sa \
    -O mountpoint=none \
    -O encryption=on \
    -O keylocation=prompt \
    -O keyformat=passphrase \
    rpool /dev/disk/by-id/<disk>

zfs create -p -o refreservation=1G -o mountpoint=none rpool/local/reserved
zfs create -p rpool/local/nix
zfs create -p rpool/safe/persist
We’ll now start to mount our partitions and datasets so we can finally install NixOS:
mount -t tmpfs none /mnt
mkdir -p /mnt/{boot,nix,persist}

mount /dev/sda1 /mnt/boot
mount -t zfs -o zfsutil rpool/local/nix /mnt/nix
mount -t zfs -o zfsutil rpool/safe/persist /mnt/persist
Configuring NixOS #
Let’s start by generating a configuration:
nixos-generate-config --root /mnt
And here follows some specific configuration, in addition to the one we’re used to.
Enable ZFS support: #
/etc/nixos/configuration.nix
boot.supportedFilesystems = [ "zfs" ];
boot.kernelPackages = config.boot.zfs.package.latestCompatibleLinuxPackages;
networking.hostId = <host-id>; # For example: head -c 8 /etc/machine-id
Set up the root user #
/etc/nixos/configuration.nix
# To generate a hash to put in initialHashedPassword
# you can do this:
# $ nix-shell --run 'mkpasswd -m SHA-512 -s' -p mkpasswd
users.users.root.initialPassword = "hunter2";
users.mutableUsers = false;
You can also just skip this part and set up remote access by SSH. Be careful not to get locked out.
Partition and dataset configuration #
/etc/nixos/hardware-configuration.nix
fileSystems."/" = {
    device = "none";
    fsType = "tmpfs";
    options = [ "defaults" "size=2G" "mode=755" ];
};

fileSystems."/boot" = {
    device = "/dev/disk/by-uuid/<boot_partition_uuid>";
    fsType = "vfat";
};

fileSystems."/nix" = {
    device = "rpool/local/nix";
    fsType = "zfs";
    options = [ "zfsutil" ];
};

fileSystems."/persist" = {
    device = "rpool/safe/persist";
    fsType = "zfs";
    options = [ "zfsutil" ];
    neededForBoot = true;
};
Swap #
Enabling swap is usually a
good idea.
But we’d also like to avoid having swap on disk, as it’s really slow.
So we’ll follow
Fedora’s lead and set up swap on ZRAM:
/etc/nixos/configuration.nix
zramSwap.enable = true;
Remote access through SSH #
To enable remote SSH access with public key authentication, we’ll add the following:
/etc/nixos/configuration.nix
services.openssh = {
  enable = true;
  openFirewall = true;
  passwordAuthentication = false;
  kbdInteractiveAuthentication = false;
  hostKeys = [
    {
      bits = 4096;
      path = "/persist/etc/ssh/ssh_host_rsa_key";
      type = "rsa";
    }
    {
      path = "/persist/etc/ssh/ssh_host_ed25519_key";
      type = "ed25519";
    }
  ];
};

users.users.root.openssh.authorizedKeys.keys = [ "ssh_public_key" ];
Static IP configuration #
Because netcup doesn’t provide DHCP, we’ll need to manually set up networking:
/etc/nixos/configuration.nix
networking = {
  networkmanager.enable = false;
  useDHCP = false;

  interfaces.ens3 = {
    useDHCP = false;

    ipv4.addresses = [{
      address = "<ipv4_address>";
      prefixLength = <ipv4_prefix_length>;
    }];

    ipv6.addresses = [{
      address = "<ipv6_address>";
      prefixLength = <ipv6_prefix_length>;
    }];
  };

  defaultGateway = "<ipv4_gateway>";
};
Persistence #
Because we have root on tmpfs, we’ll need to persist specific files and folders we wish to keep. There are many ways to do this but I found using the impermanence module quite straightforward:
/etc/nixos/configuration.nix
environment.persistence."/persist" = {
  hideMounts = true;
  files = [
    "/etc/machine-id"
  ];

  directories = [
    "/var/log"
  ];
};
Remotely decrypting ZFS #
We’ll now setup remote unlocking of the ZFS pool so we don’t need to VNC into the machine every time we reboot.
For this, we’ll need to enable networking in the initrd, which envolves enabling the correct kernel module. Not only that, if your provider doesn’t provide DHCP, you’ll also need to manually set up the static IPv4 address.
/etc/nixos/configuration.nix
boot = {
  # Set up static IPv4 address in the initrd.
  kernelParams = [ "ip=<ipv4_address>::<ipv4_gateway>:<ipv4_netmask>::<interface>:none" ];

  initrd = {
    # Switch this to your ethernet's kernel module.
    # You can check what module you're currently using by running: lspci -v
    kernelModules = [ "virtio_pci" ];

    network = {
      # This will use udhcp to get an ip address.
      # Make sure you have added the kernel module for your network driver to `boot.initrd.availableKernelModules`,
      # so your initrd can load it!
      # Static ip addresses might be configured using the ip argument in kernel command line:
      # https://www.kernel.org/doc/Documentation/filesystems/nfs/nfsroot.txt
      enable = true;
      ssh = {
        enable = true;
        # To prevent ssh clients from freaking out because a different host key is used,
        # a different port for ssh is useful (assuming the same host has also a regular sshd running)
        port = 2222;
        # hostKeys paths must be unquoted strings, otherwise you'll run into issues with boot.initrd.secrets
        # the keys are copied to initrd from the path specified; multiple keys can be set
        # you can generate any number of host keys using
        # `ssh-keygen -t ed25519 -N "" -f /path/to/ssh_host_ed25519_key`
        hostKeys = [ /path/to/ssh_host_ed25519_key_initrd ];
        # public ssh key used for login
        authorizedKeys = [ "<ssh_public_key>" ];
      };
      # this will automatically load the zfs password prompt on login
      # and kill the other prompt so boot can continue
      postCommands = ''
        cat <<EOF > /root/.profile
        if pgrep -x "zfs" > /dev/null
        then
          zfs load-key -a
          killall zfs
        else
          echo "zfs not running -- maybe the pool is taking some time to load for some unforseen reason."
        fi
        EOF
      '';
    };
  };
};
Then, after NixOS is installed, to decrypt the pool:
ssh -4 -p 2222 root@<ipv4_address>
Installing NixOS #
We’re finally ready to install NixOS:
nixos-install --no-root-passwd --root /mnt
umount -Rl /mnt
zpool export -a
And don’t forget to detach the DVD before rebooting.
reboot
Closing remarks #
Although this initial setup took some work, I’m happy with the final result.
By erasing our darlings, we keep our system clean and fresh. It’s also reassuring to know that everything that’s running is explicitly set in the NixOS configuration and that we can just move it to some other host. This also makes backups much easier, as I know exactly what needs to be kept.
I intend to have all my future servers set up like this. Hopefully, following this post will make it easier.